Radiator grill - removal and installation
Models up to August 1994
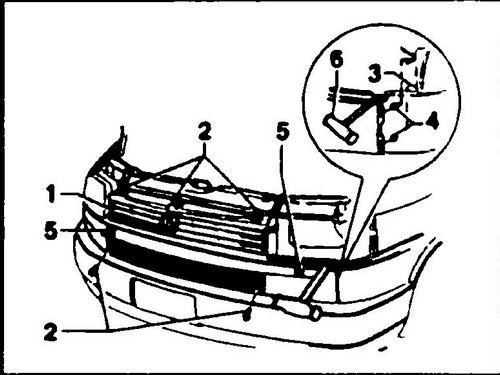
Rice. 458 Fastening of the radiator grilles of the model from 1994 to 1996
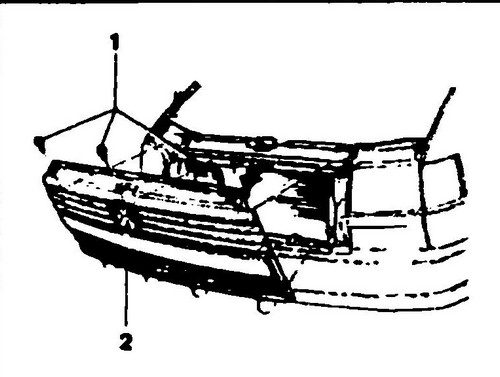
Rice. 459 Fastening of the radiator grilles of the model from 1994 to 1996
♦ Loosen the screws (1, see fig. 459) with cross slot on the head.
♦ Fold the radiator grille (2) forward and remove it from the holes below.
Installation is in the reverse order.
Models from September 1994 to 1996 - Caravel, Multivan/California, and base model from September 1994
♦ Loosen the screws (2, see fig. 452).
♦ Remove, if present, the headlight washer jets on the left and right sides.
♦ Insert a special tool or screwdriver under the main headlight.
♦ On the left and right sides, remove the radiator grille Transporter T4 (1) together with the decorative frame from the T-pins, fold the grille forward upwards and remove it from the holes at the bottom.
If the caps (4) are damaged, replace them during installation. Installation is carried out in the reverse order.
Release models since 1996
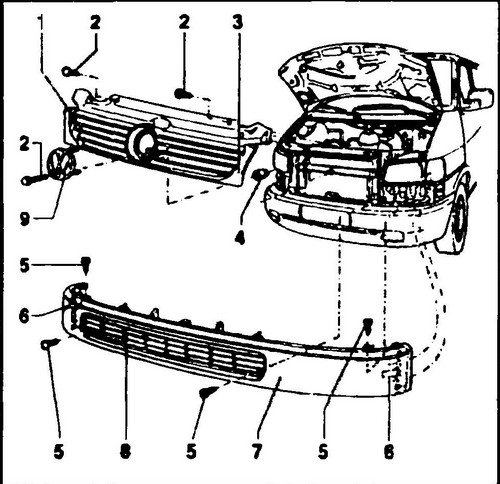
Radiator grille T4 (1, see Fig. 460) is assembled with a decorative frame (2).
♦ Loosen the screws (2) and remove the upper radiator grille with decorative frame in an upward direction.
Rice.
460 Fixing radiator grilles - Transporter T4 models since 1996 1 - upper grille, 2 - bolt with washer, 3 - upper decorative frame, 4 - rubber support, 5 - bolt with washer, 6 - clamping lever, 7 - lower decorative frame , 8 - lower grille, 9 - brand name
The lower radiator grille (8) is assembled with a decorative frame (7).
♦ Loosen the screws (5).
Remove the direction indicator lights and unlock the side clips by pressing the levers (6). Remove the radiator grille together with the decorative frame by pulling it towards you. Installation is in the reverse order.


