R4 engine - Removal and installation
Removal/installation of the R4 engine
The engine is taken out from the car The T4 conveyor down.
A four-cylinder engine can be removed without a gearbox, a five-cylinder engine can only be assembled with a gearbox. A car lift is required to remove the engine. In the absence of such, it is necessary to raise the car 60-70 cm from the floor before starting the repair, placing bars under the wheels or installing racks under the body. The car must be securely fixed from moving. Dismantling work is somewhat complicated by the relatively narrow hood cover. To facilitate access, it is necessary to tilt forward the front panel along with the radiator of the cooling system. Removing the R4 motor
♦ Remove the battery terminals.
♦ Remove the bolts on the left and right sides, tilt the radiator forward and lock the lock bracket in the direction of the arrow.
♦ Raise the front of the vehicle and jack stands.
♦ Remove the crankcase protection.
♦ Disconnect the exhaust pipe from the exhaust manifold as described in the appropriate section.
Set the heater control levers to the extreme right position.
♦ Remove the expansion tank cap.
The T4 engine must be cold
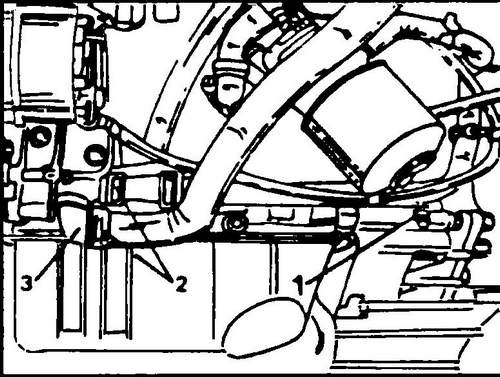
when removed ♦ Drain the liquid from the cooling system into a container prepared in advance. To do this, remove the hoses (2, see Fig. 66) or the thermostat cover (3). You can also unscrew the plug (1). The heater cock must be open so that the coolant from the heating system can also flow out. The fluid can be reused provided that it has not been used for more than two years.
Rice. 66 When removing the T4 engine, to drain the coolant, unscrew the plug (1), disconnect the hoses (2) or remove the thermostat cover (3)
♦ Loosen the clamp and disconnect the upper coolant hose from the head of the block.
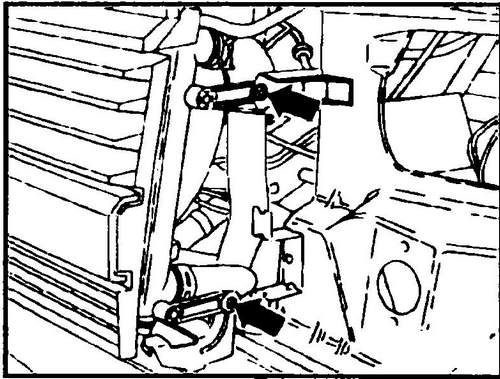
Disconnect the same hose from the radiator. The rubber hoses are secured with either spring or band screw clamps. ♦ Knock out the radiator mounting pins on the left and right sides and disconnect the spring connectors (see arrow in Fig. 67). Then remove the radiator.
Rice. 67 Radiator mounting points (left and right sides)
♦ Disconnect the electrical connectors from the thermal switch and the R4 engine radiator fan motor.
♦ Disconnect the electrical connector located on the back of the generator.
♦ Disconnect the connector from the ignition distributor, disconnect the supply and return fuel pipes from the fittings.
♦ Disconnect the linkage from the throttle lever, remove the throttle linkage bracket.
♦ Do not loosen the clamp on the bracket.
♦ Disconnect the electrical wire from the 1.8 bar (0.18 MPa) oil pressure switch.
♦ To remove the T4 engine, disconnect the electrical wires from the remaining electrical components and assemblies and disconnect the vacuum hoses from their connection points.
To facilitate reassembly, mark the opposite elements before disconnecting. ♦ Disconnect the central high voltage wire from the distributor cap.
♦ Disconnect the wire from the temperature sensor located on the cylinder head.
♦ Disconnect the wire from the 0.3 bar (0.03 MPa) oil pressure sensor.
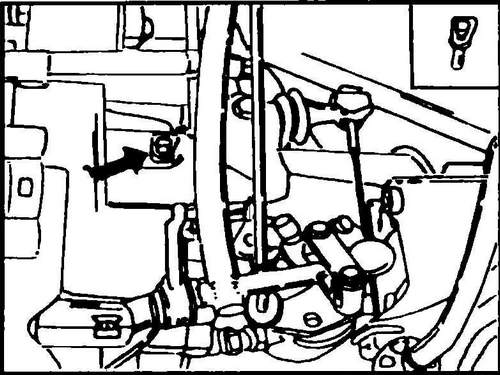
♦ Remove the rubber plug from the gearbox housing (see Fig. 68), and block the clutch release lever with a rod (M8x22 bolt).
Rice. 68 After removing the plug, block the clutch release lever with the rod
♦ Remove the rubber hose connecting the pump fitting to the radiator.
♦ Place a jack under the center of gravity of the R4 engine (make sure to place a board between the heel of the jack and the oil sump) and raise the engine slightly to relieve the mounts.
♦ Remove all bolts accessible from below connecting the engine to the gearbox.
♦ Remove the rear engine mount.
♦ Check that the power unit is securely jacked up and remove the right engine mount and engine bracket.
♦ Remove all bolts securing the engine to the gearbox from above.
♦ Decouple the engine from the gearbox, making sure that the engine is supported securely on the jack at all times.
Have an assistant lower the engine slowly on the jack. In no case should the engine be allowed to hang on the input shaft of the transmission, as this may cause damage to the shaft or clutch disc. Since various devices are connected to the engine, care must be taken that the engine does not hang on any connection (wire, hose). To do this, lower the engine very slowly, regularly checking the freedom of the perimeter. Installation
The R4 engine is installed in the reverse order to the removal of the T4 engine, while the following recommendations must be followed:
Before installing the engine, always check the condition of the release bearing.
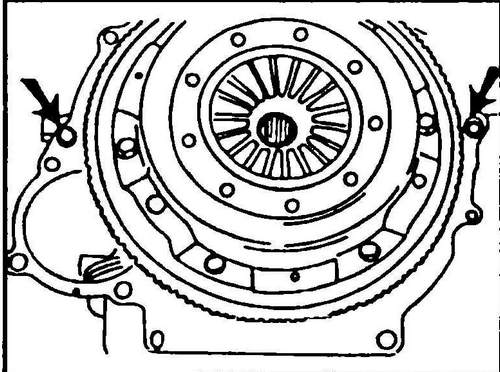
The bearing surface of the release bearing, as well as the splines of the gearbox input shaft, must be lightly lubricated with grease. The release bearing guide sleeve is not lubricated. ♦ Check that both guide bushings are in place in the motor housing (see fig. 69). If they are not there, then they remain in the gearbox housing and must be removed (in case of replacing a block or gearbox). Install new bushings into the engine housing flange.
Rice. 69 Holes in which guide bushings must be installed
♦ Lubricate the intermediate plate in several places on the engine side, seat it on the guide bushes and press it against the engine.
♦ Lift and hang the engine in the engine compartment of the T4 Transporter.
Align the clutch disc and transmission input shaft. Slightly turn the crankshaft (by the V-belt) in one direction and in the other so that the splines of the input shaft are aligned with the splines of the hub of the clutch disc. Before tightening the bolts, press the engine firmly against the gearbox to select the gap between the two flanges. ♦ Install and secure the engine mounts.
Tightening torques, Nm
Engine support at the suspension cushion .......... 65
Right engine support .................. 50 + 90º
Engine to gearbox
M8 bolts ................................................. .20
Bolts M10............................................... ...60
Bolts M12....................................... .....80
Rear engine support at the
engine housing .............................................. ..............................45
Rear engine mount at the gearbox
.............................................. ......................20
Protection of the crankcase of the power unit ...........20
♦ Fill the cooling system with liquid after opening the heater cock.
Fill the expansion tank up to the “MAX” mark, and then screw on the tank cap. Run the R4 engine briefly to bleed the entire cooling system. Finally, check the coolant level in the expansion tank again and top up if necessary. ♦ Connect the exhaust pipe to the exhaust manifold as described in the appropriate subsection.
♦ Adjust ignition timing and idle speed if necessary.
♦ Check the installation of the headlights and adjust if necessary.


