Front door - removal and installation
Removal
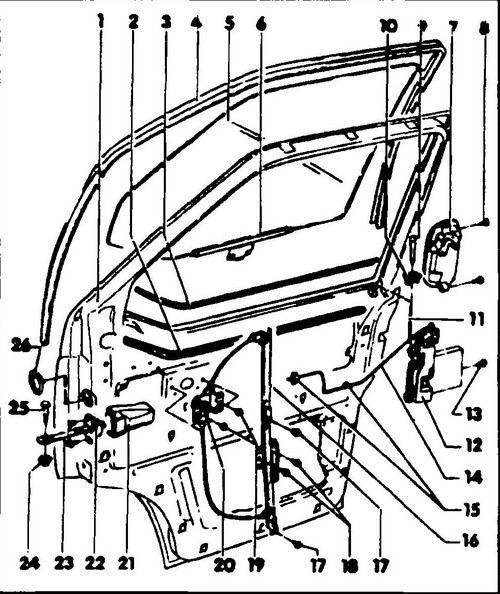
♦ Detach the stopper (22, fig. 479) from the door, to do this unscrew the nut (24) and remove the axle (25).
Rice.
479 Front door device 1 - front door, 2, 3 - glass seals, 4 - guide / glass seal, 5 - glass assembly, 6 - glass bracket, 7 - outer door handle, 8, 13 - screws, 8 Nm, 9 - manual lock button, 10 - button guide, 11, 14 - rods, 12 - lock, 15 - retainers, 16 - power window rod, 17, 18, 19, 23 - screws, 7 Nm, 20 - power window mechanism, 21 - cap, 22 - door opening limiter, 24 - nut, 7 Nm, 25 - axle-screw, 26 - plug
♦ Remove the bolts securing the upper and lower hinges to the body pillar and remove the door.
The heads of the mounting bolts can be circled with a marker - this will facilitate subsequent assembly. Transporter T4 vehicles with central locking, electric windows, electric adjustment and heating of exterior rear-view mirrors, sound system, etc.
disconnect and remove the electrical wires from the door, for which you must first remove the decorative panel, see below. Installation
♦ Move the door to the opening and hand-tighten the hinge bolts.
♦ Connect the limiter, tighten the nut (24) to 7 Nm.
♦ Align the door in the opening according to the marked marks and tighten the hinge bolts to 55 Nm.
Adjustment
Adjustment is required when installing a new door or an old door after repair.
When adjusting ensure the same gaps around the entire perimeter and parallelism with respect to adjacent elements of the body ♦ Remove the door as described above.
Loosen the bolts securing the hinges to the door, move the hinges and tighten the bolts securing the hinges to 55 Nm. Put the door in place. ♦ Adjust the position of the door around the perimeter.
Loosen the hinge-to-pillar bolts and align the door with the opening and adjacent body panels. Tighten the hinge bolts to 55 Nm. It is allowed to sink the door inside no more than 1 mm in relation to the surface of the front wing. ♦ It is also necessary to adjust the horizontal position of the lock shackle.
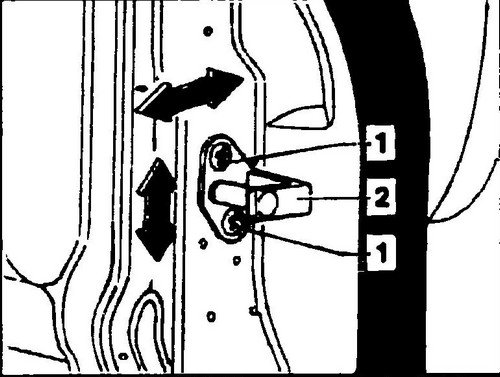
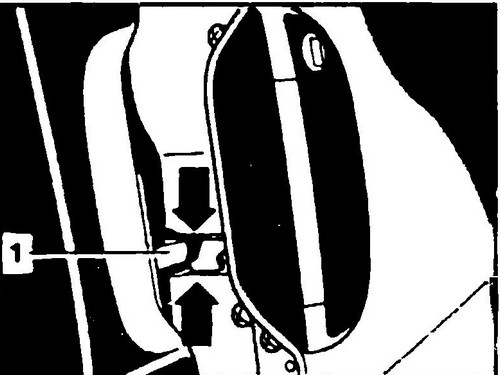
To do this, loosen the bracket mounting bolts (see Fig. 480) so that the bracket can be moved with little effort. Carefully close the door and align it with the opening. After that, carefully open the door and tighten the bracket fastening bolts. ♦ Adjust the lock shackle (see fig. 481) vertically so that the groove of the door lock with the swivel latch (see arrow) is located along the axis of the shackle. When locking, the door must not move up or down. In the closed position, the door should sit snugly in the opening without play.
Rice. 480 door lock bracket
Rice. 481 Lock shackle adjustment


