Replacing the rear suspension springs
On fig. 400 shows a trailing arm and a coil spring. The springs are marked with colored stripes depending on the vehicle group. On fig. 404 shows the placement of these labels. You need to look for them by looking at the springs from the bottom of the Transporter T4 .
♦ Clear this place.
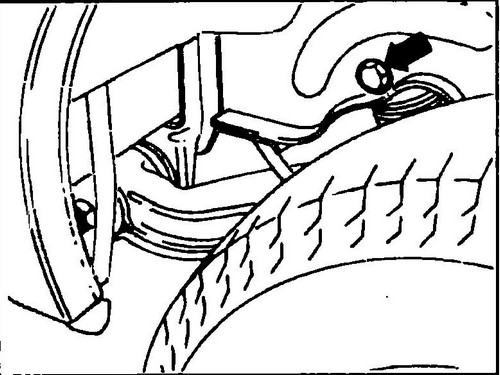
The spring is clamped between the body and the trailing arm, that is, as a result of limiting the stroke of the lever by the shock absorber, the spring cannot fall out of the mounts. ♦ Loosen the wheel bolts and the bolt shown in fig. 404.
Rice. 404 Upper shock absorber mounting bolt (above the rear wheel)
♦ Put the rear of the car on stands and remove the wheels.
Place a jack under the trailing arm and lift the arm with it so that the shock absorber is compressed. ♦ Remove the bolt securing the shock absorber from above.
♦ Slowly lower the lift until the trailing arm is low enough to unload the spring.
Remove the spring along with the top plate. If necessary, also remove the rubber stopper. The helical spring is installed in reverse order. In doing so, the following instructions must be followed. ♦ Place the upper spring plate (12, fig. 400) so that the end of the spring is fixed in the plate recess
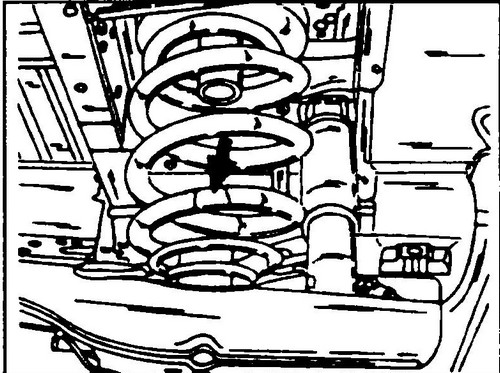
♦ Turn the spring so that the spring marking is at the bottom of the vehicle (fig. 404).
Rice. 405 Spring marking location (see arrow)
♦ Install the spring together with the plate and have an assistant hold it until the trailing arm is properly “fitted” between the body and the arm as a result of jacking up the trailing arm
.
wheel in place and lower the vehicle to the ground
♦ Tighten the bolt securing the shock absorber from above to 100 Nm
♦ Tighten the wheel nuts to 160 Nm.

