headlight adjustment
Proper adjustment of the headlights of the Transporter T4 is important both for road safety and for driving comfort at night, especially when driving on the highway.
The direction of the flow of light from the headlights should provide illumination of a sufficiently long section of the roadway, but not blind the drivers of oncoming vehicles. Accurate, “by science”, headlight adjustment is possible only with the help of special devices. Therefore, the following describes where the adjusting elements are located and the conditions for adjusting. Tires must be inflated with air at normal pressure.
The car must be loaded with only 75 kg (weight of one person) located on the driver's seat.
The fuel tank must be filled.
Park the vehicle on a level, preferably level ground.
Push the front of the car hard down a few times so that the front wheel suspension springs are firmly in their working position.
After that, roll the car a few meters. Set the headlight range adjustment knob to "O".
The headlights are adjusted only in low beam mode. The size of the deviation of the optical axis of the main headlights is 12 cm at a distance of 10 m, and fog lights at the same distance - 20 cm. See fig. 525 and 528.
Rice.
528 Adjustment screws - models from 1996. A - height adjustment, B - horizontal adjustment
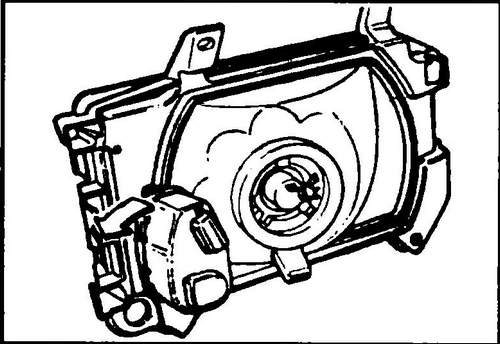
Fog lamps can only be adjusted in height, horizontal adjustment is not provided. To adjust the height, turn the gear wheel by passing a screwdriver through the headlight recess. On vehicles without a spoiler, the gear wheel can be turned by hand, see fig. 529.
Rice. 529 Fog lamp adjustment wheel
Removal/installation of the servo mechanism for adjusting the angle of inclination of the headlights
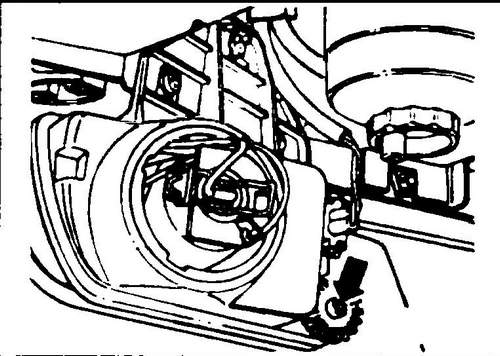
The servo mechanism is located in the headlamp (see Fig. 530). Using the button on the instrument panel, the headlights are set to the desired position.
Rice. 530 Removing the headlight adjustment servomotor
Removal
♦ Remove the headlight.
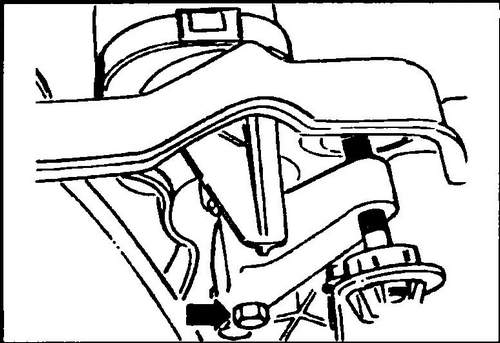
♦ Remove the screw for headlight beam throw adjustment (see Fig. 531).
Rice. 531 Screw fixing the axis of the servomotor
♦ Unscrew the motor shaft.
♦ Turn the actuator to the right for the right headlight or to the left for the left headlight, disconnect it from the headlight housing (see Fig. 530).
♦ Remove the servo.
Removing/installing fog lights
Removal
♦ Remove the cover from the back of the headlight.
♦ Disconnect the electrical connector.
♦ Remove cross-head screws (Philips type) - models manufactured before 1996 or slotted screws (type Tox) - models manufactured from 1996 (see arrow fig. 532) and remove the fog lamp towards the wheel arch.
Rice. 532 Fog lamp mounting screws - 1996 model year
♦ Installation is carried out in reverse order.
Removal and installation of the rear lamp
All models of vehicles except flatbed truck
♦ From the inside, disconnect the connector from the lamp panel.
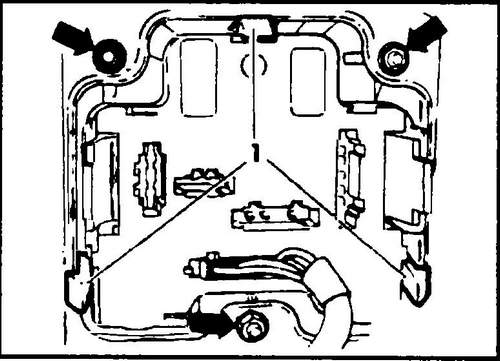
♦ Loosen the three fastening nuts (see arrow fig. 533).
Rice. 533 rear light nuts
♦ Squeeze the fixing tabs (1) of the lamp panel and pull the lamp out.
♦ If necessary, replace the rubber seal between the lamp and the body.
Flatbed Truck
♦ Remove the four screws securing the light lens.
♦ Loosen the 2 hex nuts on the inside and remove the lantern.
♦ Installation is carried out in reverse order.


